Saturday, May 30, 2009

First victory against the rust!

Today I finally started working on the rust in the interior of the car. I started at the back in the hatch area and I'm working my way forward.


Note that I didn't cleanup all the rust. I need to drop the fuel tank and snake those wires back through the floor before finishing. I was worried about hitting the wires with the grinder, so I'll come back to this.


I also bought a replacement center console off a guy on corral.net. $135 shipped wasn't cheap, but it is the correct replacement part that the previous owner cut in half.

Tuesday, May 26, 2009

Memorial Day Weekend 2009

Well, I've started on the body work.

Actually I first finished removing the sound deadener. I ended up using a '6 in 1' painting tool which is thicker than a regular paint putty knife. Only a few pieces didn't want to come up easily, but after an hour or so all the black sound deadener was gone.

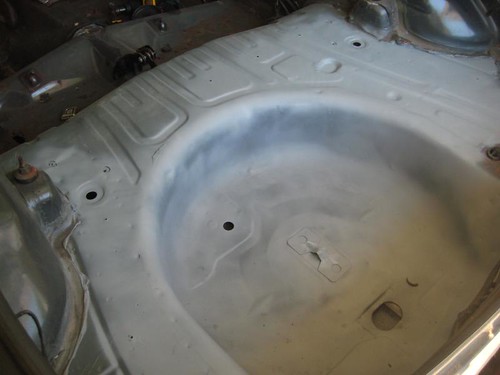
I bought an angle grinder, sanding/stripping disks, etching primer and some sand paper. Figured I'd start in the hatch area and the spare tire well.

An hour into it, I was really confused and frustrated. So I took a break ;-)

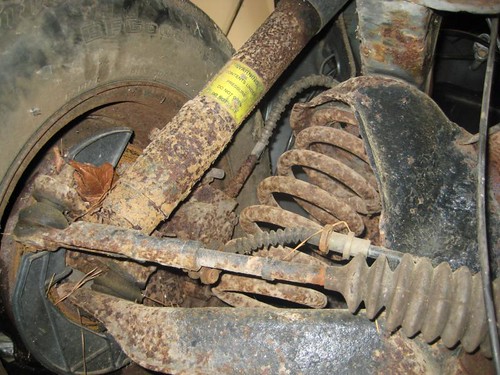
Turns out trying to grind on the irregular and curved surfaces is a pain in the butt. So I got out some sandpaper and eventually used naval jelly on some areas I couldn't get into. Naval Jelly is some interesting stuff. Put it on and a few minutes to an hour later the rust was gone. Clean it off, sand the area and you can primer it.

Of course the instructions said to put it on for 10 minutes. After 10 minutes, nothing changed. So I left it on for 20 minutes. Some rust removal. 30 minutes and it cleaned up pretty well. Except I only did an area about 6" by 6". So this isn't going to scale well if I can't do more than a few square inches every 30 minutes.

After about 4 hours of working, I had cleaned the spare tire well, sanded it down and shot it with the primer. Not a lot of progress for a lot of hours, but I know what I'm doing now ;-)

Most of the rest of the weekend was taken by family events, projects and my 17th Wedding Anniversary (She wanted to see Star Trek, so who am I to argue?).

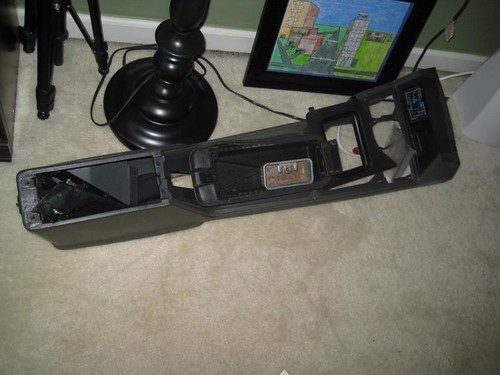
I did spent a few hours Monday morning organizing the shed where I'm keeping all the parts. All the big stuff is now in the shed and I can get to the lawnmower again. Plus no more parts on 'her' side of the garage.

Saturday, May 16, 2009

First new parts!

So what if they are the supports for the hatch, I put the first new parts on her today!

I had lots of family obligations today so I only got about an hour and a half of work on the car. First task was to replace the rear hatch struts. Then I removed the interior panels, back seat and took a good inventory of how things look.

I found another rust-through area under the driver's side back seat. This one is a good size so when I clean it up I'll have a good sized hole.

I also crawled underneath and looked around. Not a lot wrong under there. Looks like they bent the transmission support removing the old one, but not too bad.

Weather and family permitting, I am going to start rust-removal tomorrow!

Saturday, May 9, 2009

Mother's day weekend - no time to work on the car!

We had a really busy Saturday playing softball, so I didn't get to work on the Capri at all.

Tomorrow is Mother's day so I don't think Deb will like it if I'm in the garage all the time!

I did get a wiring harness for the car and the rear hatch lift supports so I don't need a piece of pipe to hold the hatch up! I'll install the supports next weekend.

Next weekend I want to finish taking the interior apart and maybe grind the rust out of the hatch "trunk" area. So the body work begins!

Saturday, May 2, 2009

Pictures of the 1980 Capri

I found some pictures of the 1980.

This is August 1986 before I went to college


This is August 1988 before I went back to school. Note the door pin stripe and missing molding. The stock doors had rusted completely. I hadn't gotten the paint fixed. Actually I never got it fixed!


I know there are more of just the car, I just need to find them.

Removing the front clip

It poured last night so the fields were too wet for the last softball games. So, I started taking the front end off the Capri.

Boy what a pain in ass. Deb commented that I hadn't been that filthy as long as she's known me (which isn't true, when the put the motor in the 1980 Capri I was filthy)

It took a couple of hours to get the first fender well unscrewed. Drivers side first. After 25 years this car was really rusty.

After a couple more hours of unscrewing, breaking the heads off bolts and generally making a mess, I got the nose and both fenders off. I only got frustrated a couple of times, so I stopped and took a break. Nice thing about not having to get it together to drive it to work Monday!

I found that the passenger front rim is rusted to the rotor. Banged on it for a few minutes before giving up. One more thing to deal with ;-)

Unfortunately, I found proof of what I've been suspecting since I brought her home: The car was in a front collision at some point. First clue was the engine bay looks like it was pained black, not the blue/gray color of the body. Second as I started unbolting things I found different sized bolts on each side in the same spots.

It looks like it took a hit on the drivers side, since that fender doesn't have the same mounting points for the front spoiler as the passengers. There is also visible damage underneath.

Worse is the rust under the battery tray. See below. One of Courtney's friends is sleeping over tonight and her Dad is a body/paint man. He looked at the rust and said I'd need to cut it out and replace the whole part. Luckily we can get replacement parts for the parts in trouble.

Pictures below.


Friday, May 1, 2009

Headliner removal

Today I only had a few minutes to work on the car so I removed the headliner.

It was falling and smelled pretty bad (notice a theme here? the inside of this car stinks).

I had my first problem with the car: each of the sun visors had a rusted bolt that wouldn't come off. After spraying WD-40 and trying a couple of things I had to give up. I had no problem getting the rest of the trim off.

I first pulled the vinyl down completely. That made a nice mess. I then looked at the cardboard liner and it had a bunch of stains on it. I poked it with a screwdriver and it started flaking. So, the cardboard was shot.

I cut around the sun visors and pulled the rest down. The insulation between the roof and the cardboard was rotted and falling apart. So I pulled it down as well and thew it away. For now I am going to keep the headliner and backing board so when I get the replacement I can cut to match.

The roof has some glue on it and I think some surface rust, but I need to get back in the car when there is better light. It might just be glue.

I also need to find out if there are aftermarket sun visors and how the screws are into the body. I may have to cut them out and use a vise grip to get the screws out.

Total time: 1 hour