Thursday, December 29, 2011

Mustang and Capri gas tank pin size

I've noticed a lot of requests for the sizes of these pins on various boards. I cleaned mine up today and took  a few pictures to help:


This picture doesn't show it well, but the pins are lined up at the 2" line:


Hope this helps someone searching for the information some day.

Junk yard trip

Today I went to the junk yard (Atlanta Pick-a-part technically) to look for some parts for the Capri. Main thing I was looking for were driver's and passenger's side drip rails for a < 87. Mine are crimped from where a previous owner had put a ski rack on the car.

Unfortunately I could only find chrome ones, and only one good set and one good passenger side. I did also find several of the moldings that go at the base of the windshield where it meets the cowl, since both of my were broken.

I also found an 81 Capri only in the yard a few days. It was in very good condition and should have been saved and restored. No rust anywhere that I could find, even under the floor boards. I picked off one of the front moldings, but the other was glued and screwed on so I gave up. There were a couple of guys taking the doors off when I left.

I also got a coil and bracket and a window slider to replace the rusted one on the car now. Not bad for 2 hours of wandering around.

Saturday, December 10, 2011

Back from the machine shop

After 3 engines, I was finally able to find a block that could be bored out and cleaned up. Sent it to Goza Automotive in Acworth for some work.

Cleaned up block. Bored 0.030 over, new freeze plugs, crank line bored.


Pistons: 0.030 CP pistons from Bo-port by way of Stinger. Shotpeened rods, bushed little end, big end 'cleaned up'.


Crank polished:


Needs a little more clean up on the block before painting:


Since Christmas is right around the corner I'm not going to be able to assemble it for at least a month. I put it on the engine stand today and covered it with a couple of clean towels. Any advice on how to store it for a month or so?

FYI: all 3 heads had significant cracks in them, so none were rebuildable. I took the other two blocks and the three heads to a recycling place today and got $44. Whoo Hoo.

Tuesday, December 6, 2011

0 for 3 with the heads

I picked up the block, pistons, crank etc. from Goza Auto Parts and Machine Shop today. Need to go through them when there is light and I have time, but looks like everything is there and done. Pictures soon.

They cleaned and Magnafluxed the two heads that appeared to be crack-less, but both were shown to have major cracks once cleaned up.

So 0-3 on the heads. Now to figure out where to get rid of them so I get some garage space back!

Thursday, November 17, 2011

Monday, November 7, 2011

Repairing the fuel level sender

Since the Capri sat for many years, the fuel tank is destroyed and rusted from the inside. The fuel pump retainer ring won't even come off and the fuel level sender took several days of soaking and love taps with the brass pick and rubber mallet before moving.

Since the 84 is an odd-ball year, no one stocks the replacement level senders.  Through searching around I found a company, S.U.R & R. (http://www.fuelsender.com/) that rebuilds the sending units for cars that you can't buy off the shelf. I sent it to them a few months ago and got it back in about a week.

Amazing the difference!

Before:
After:
Not bad for $120 plus shipping!

Saturday, October 29, 2011

Third time's the charm?

Today I took apart engine #3. Yes, #3. I started with two long blocks of questionable history/status. I knew there was a chance they weren't going to be okay when I bought them, but I got a good deal on them and some other 2.3T stuff.

I took apart block #1 and took it to a machine shop to see what state it was in. Turns out it is is already 0.030 over and needs to be bored 0.040 if I want to use it. Oh and 0.040 over pistons are $600 for this motor!

Took block #2 apart and took a piston to the machine shop to see how over bored it is. It is 0.060 over! Damn, for a turbo block that is unbelievable. So I didn't bother bringing the block in.

A couple of weeks ago I found an ad on Craigslist with a guy parting out a few vandalized Merkur xr4ti's. He was nearby so I went over and took a look. Turns out one has only 116k miles on it! (all the glass was broken and interior trashed so I don't feel bad about taking the motor.)

Got it home yesterday and the little guy immediately noticed it was hanging from an engine hoist. He of course wanted to raise/lower it, but being on 5 I wouldn't let him.

What I got: motor from an 88 or 89 xrt4i, stock T3 turbo, intake, PF3 computer, small vam, E6 exhaust manifold and hopefully a 100% stock bore block.

Got everything taken off/apart today in about 5 hours, with a break for lunch and the last baseball game in between. Other than a breaking a head bolt (!!@%@@%#) everything came apart pretty easily.

Next step: bring the block to the machine shop and see how usable it is. Hopefully can just be re-ringed, but I suspect we'll have to go 0.020 or 0.030 over (0.030 means we can use the old pistons!)

The little guy giving me a hand.


Thomas the Tank on the Engine Hoist (now named Cranky)


Better picture.


Oops

Sunday, September 4, 2011

Brakes!

After a slight change in plans yesterday (went to Dragon*Con with my daughter and had a blast) I got back to working on the Capri for the first time since July 4th weekend. It was just too damn hot and humid in Atlanta this summer, even early in the morning to get anything done.

First, I bench bled the master cylinder and installed it. Here is a finished picture of the line without the brake proportioning valve.


I then started to bleed the brakes. Man was that a pain! Every time I thought I found all the leaks, I found more. And with every leak found I could tighten the nuts even tighter, when a second before I couldn't. (Make me wonder if I missed a 'best practice' of lubing the nuts to get them tight the first time?). Lots of little drips, skinned fingers and cursing of inanimate objects, I had the brakes bled! I did use a vacuum bleeder, not sure how I would have done it without one!

I also finished setting up the rear drums so they catch with the emergency brake and the pedal! Of course without an engine to produce vacuum I won't REALLY know how good a job I did, but no leaks!

I then put the car on the ground and finished the MM Caster/Camber plates. In the air I couldn't get enough compression on the strut, so on the ground I stood on the k-member and could get them installed properly. Here is the 'all done' picture:


I need to think about 'next steps' now that the weather is getting more work in the garage friendly.

One more thing, first casualty of the project. My favorite shit-kicker t-shirt is done. Even after washing it last weekend after mowing, it still reeked, so today after sweating for 6 hours, I tossed it in the trash.

Friday, September 2, 2011

Quick update

Dropped the block, crank, rods and pistons to be checked out. Hope this weekend to get the brakes finally finished.

Friday, July 1, 2011

Dash shell work


After all the work to cleanup and paint the metal frame that one will ever see again, it was time to put it all back together. Well, not everything. The HVAC piping needs to be cleaned and the foam insulation replaced, but the metal and the wires are back.

(Why work in the garage where it is 90+ degrees when the house is air conditioned and the computer with the 'before' pictures are in the house?

Not a lot to see here. (If you want to see what individual parts of the wiring look like behind the plastic, go here)

Sunday, June 12, 2011

Dash hull rust

Not a lot of progress this weekend, I spent Saturday running around with the kids so I only had a few hours today.

First, the correct brake line from Classic Tube still hasn’t arrived. I was told it was shipping last Friday, but no shipping information yet. I called them on Friday and of course no one picked up since it was a few minutes after 5. So no brakes.

Instead, I took a crack at the dash hull, since the wiring is the next big thing to do on the car. The hull itself is in really good shape, but the metal frame inside is covered in rust (like the rest of the car was!) After several hours I was able to get it extracted from the wiring.

Here is how bad the rust was:


I then sanded the parts and painted them with Eastwood Rust Encapsulator. The humidity here made it hard to brush on, but I got just about everything covered.


I also bought a gallon of Evapo-Rust and started cleaning all the original fasteners. I took really close pictures of all my notes with each fastener, then put them into a half-gallon plastic bucket for a couple of hours. Came out great for the about half of the fasteners and brackets. The extra-rusted ones are going to sit over night. I’ll get some after pictures for next time. Unfortunately I don’t have a bucket big enough to put the dash frame.

Assuming the brake line arrives this week putting the brakes together is the next thing, then the heater box and dash.

Monday, May 30, 2011

Unproductive weekend

Sorry, no pictures this time. Unfortunately nothing to show.

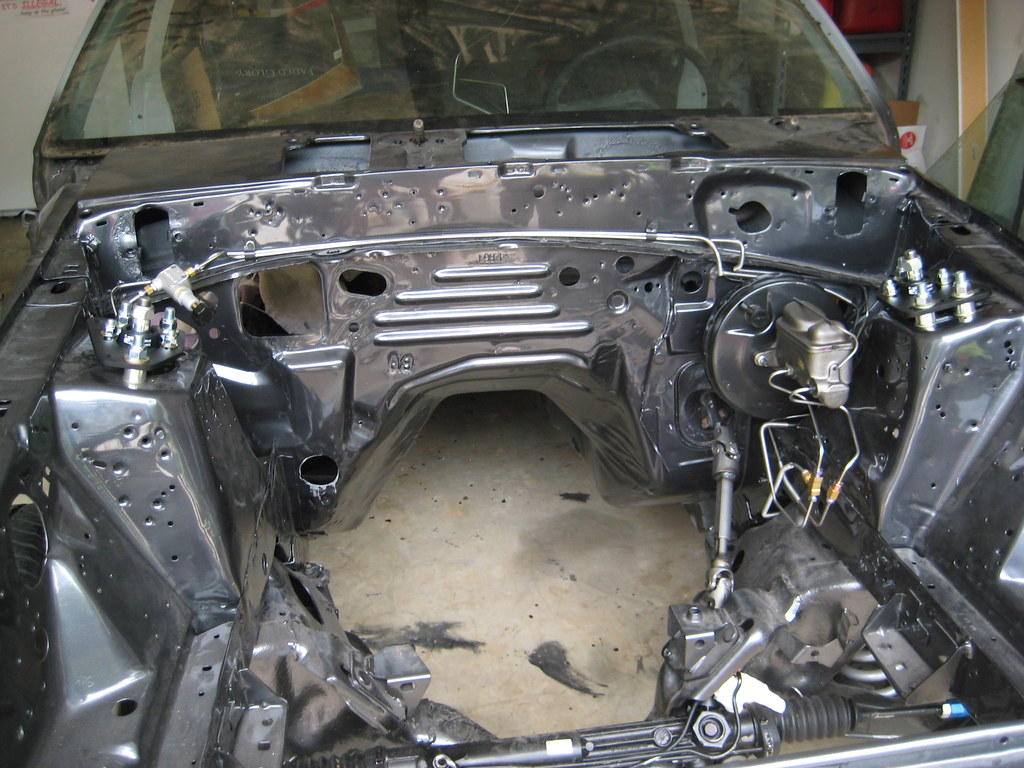
I had a big plans for this weekend: install all the brakes. New lines, master cylinder, brake booster everything. I ended up installing the brake booster.

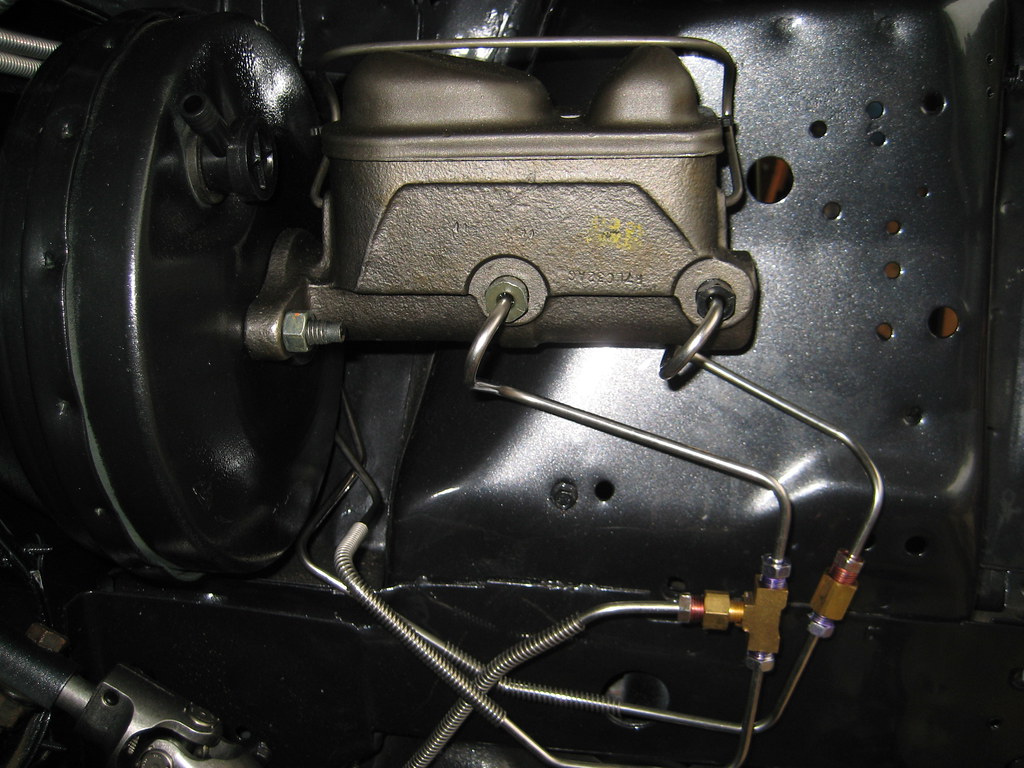
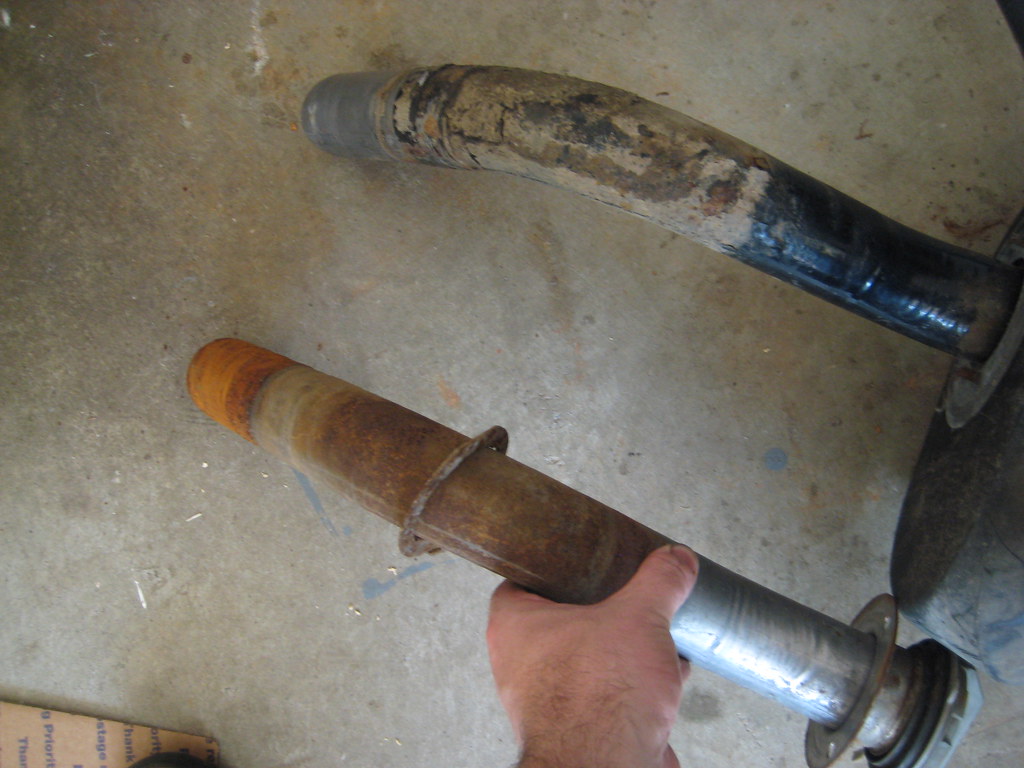
First off, the lines I ordered from Late Model Restoration, which are drop shipped from Classic Tube, had the wrong 'long' brake line. The line from the engine compartment to the rear end was not correct. I think they sent me an 87-93 one, since it is a lot longer and has a different connection on the end. Found this out as I was marking where the existing mounting brackets are on the new lines. It was 5 pm eastern by the time I tried to call them, but everyone was gone for the long weekend!

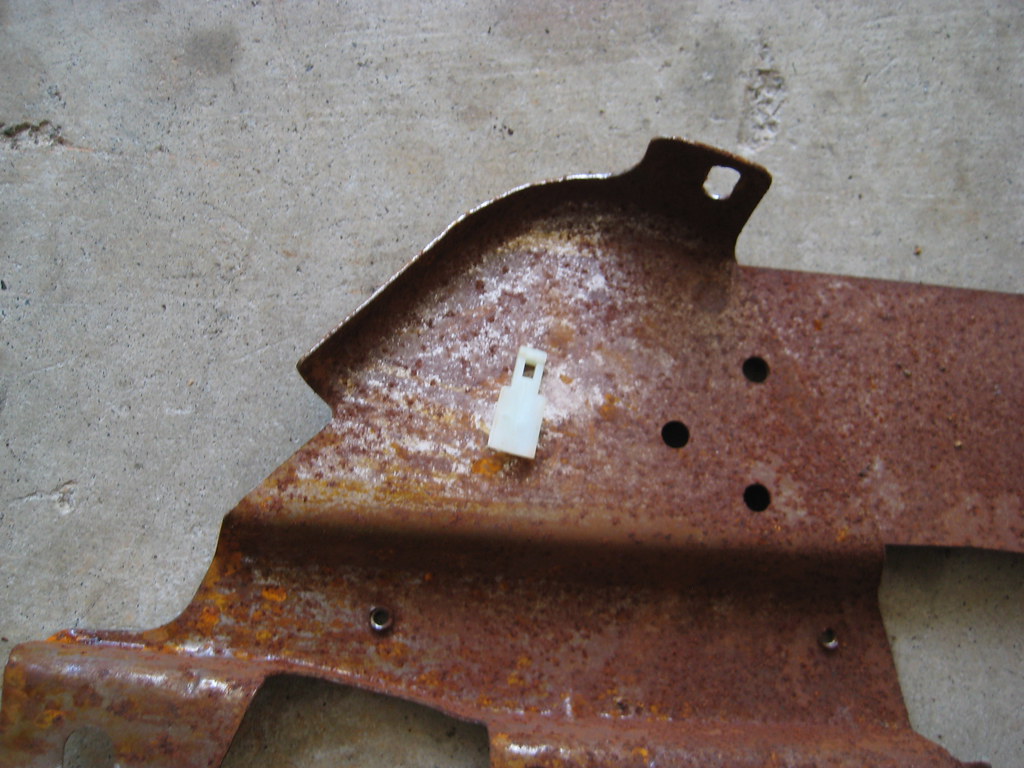
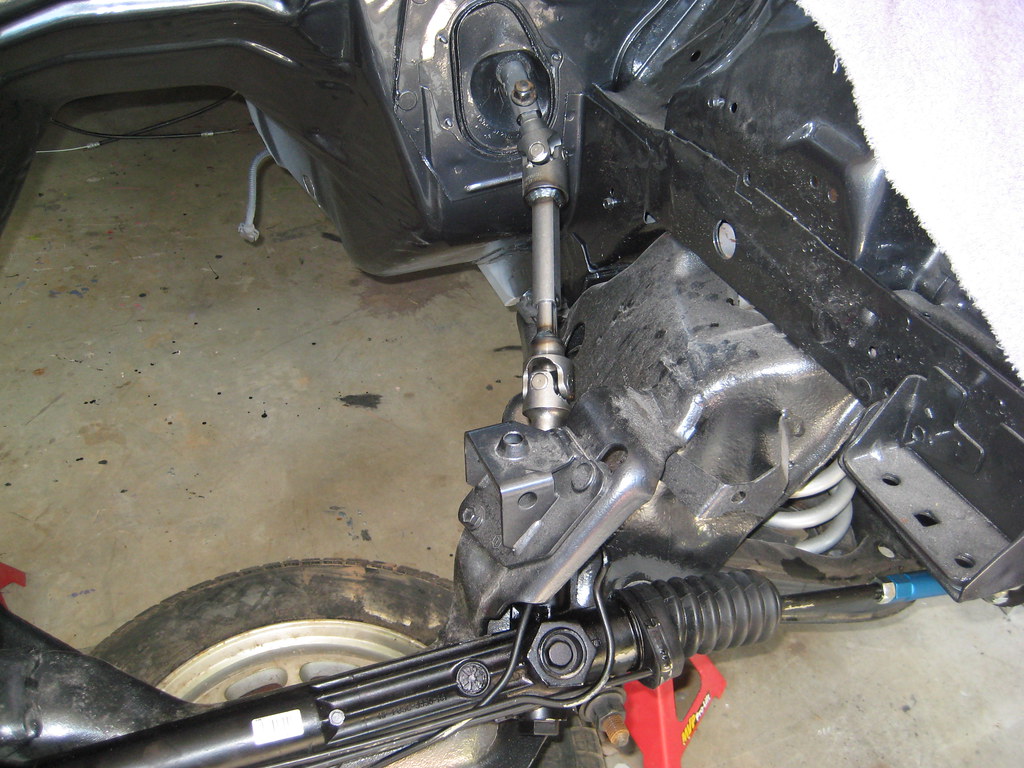
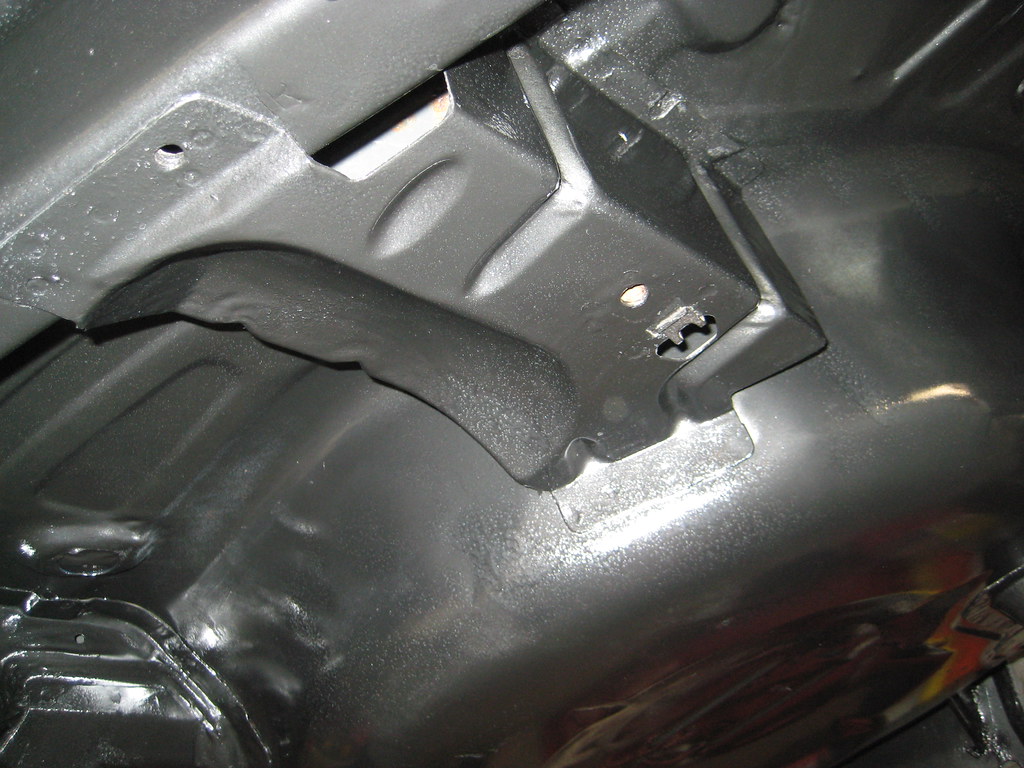
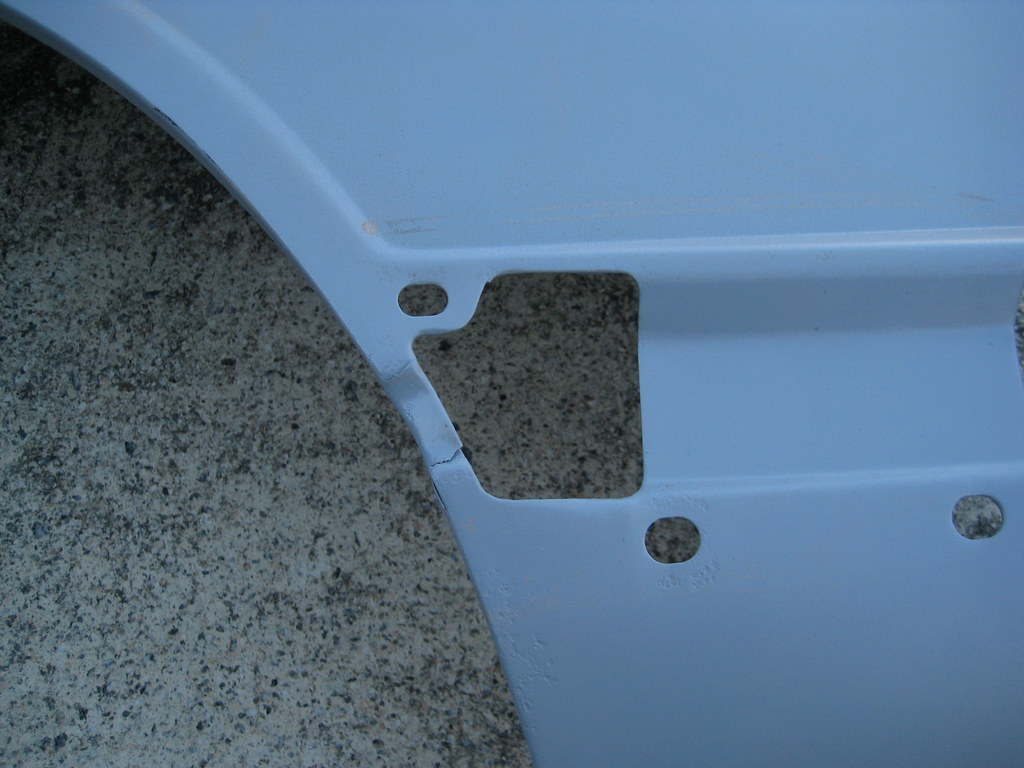
Next, I went to install the front brake lines and found that the driver's side chassis didn't have the hardline to softline bracket. This is the part that attaches the lines to the frame so they don't hit the tires.

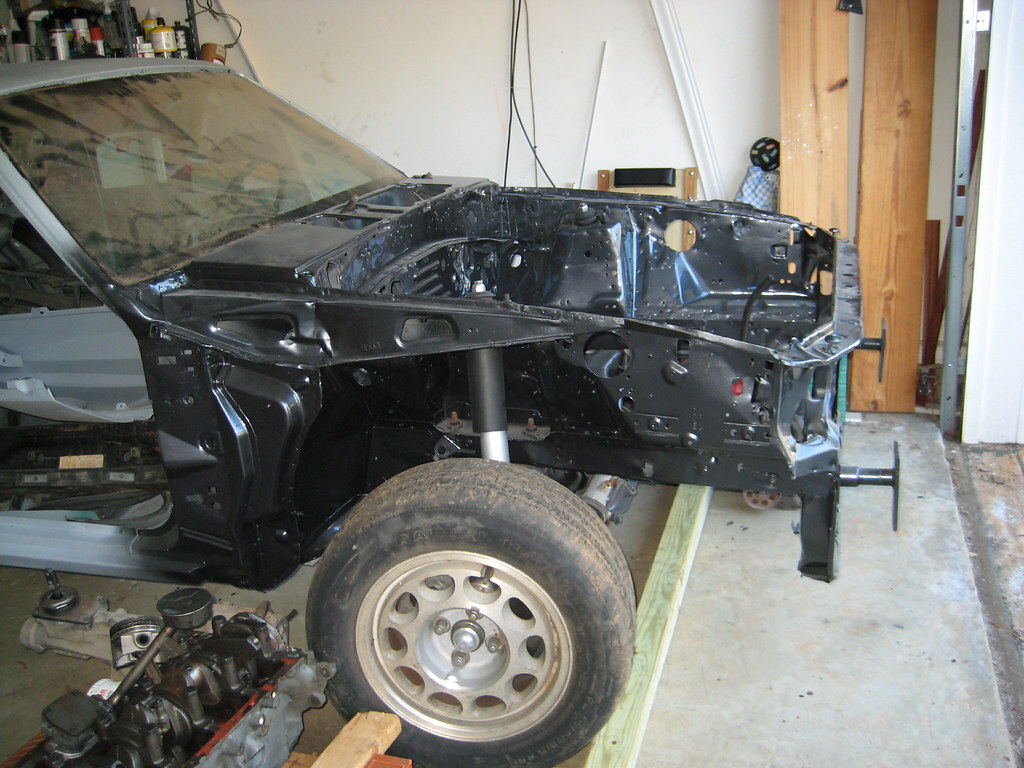
Next I went to install the rear end again. Last time it took me about 30 minutes to do. This time, 3 hours. Including it falling off the jack and needing Deb and Meg to help me get it back on. Before anyone comments about safety, the car is on jack stands on all four corners and have a stack of old tires under the passenger side frame near the front of the car and a tire under the drivers side. So if the CAR had come off the jack stands it would have landed on them.

What happened is the rear end rotated off the jack so the rear end cover was on the floor. No where near where I was trying to position the jack. But loud enough that Deb came out to see if I was okay. (Actually pretty nice that she heard something and came to check on me.) I couldn't lift it myself on to the jack, so Deb and I rotated and lifted the rear end while Meg positioned the jack.

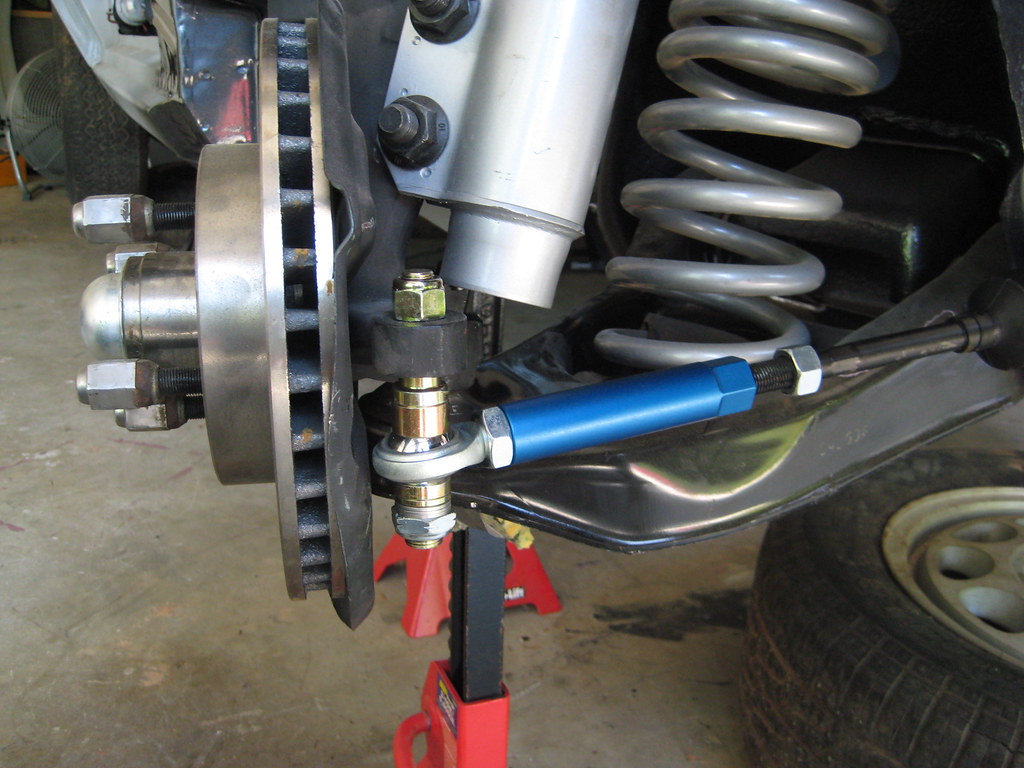
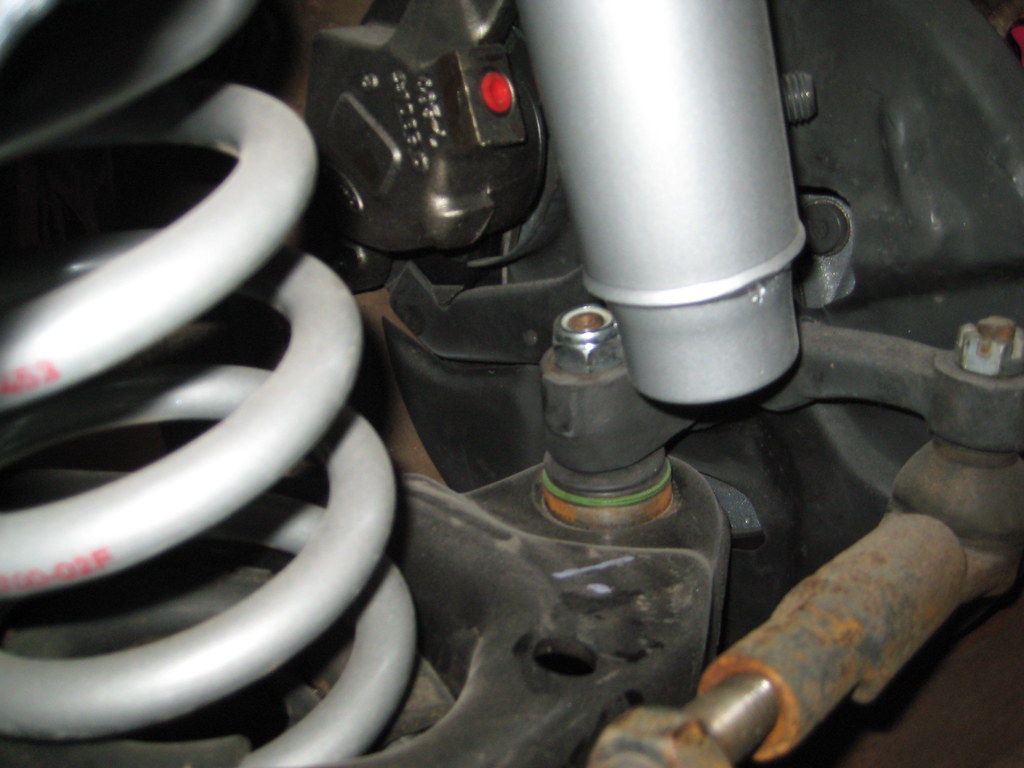
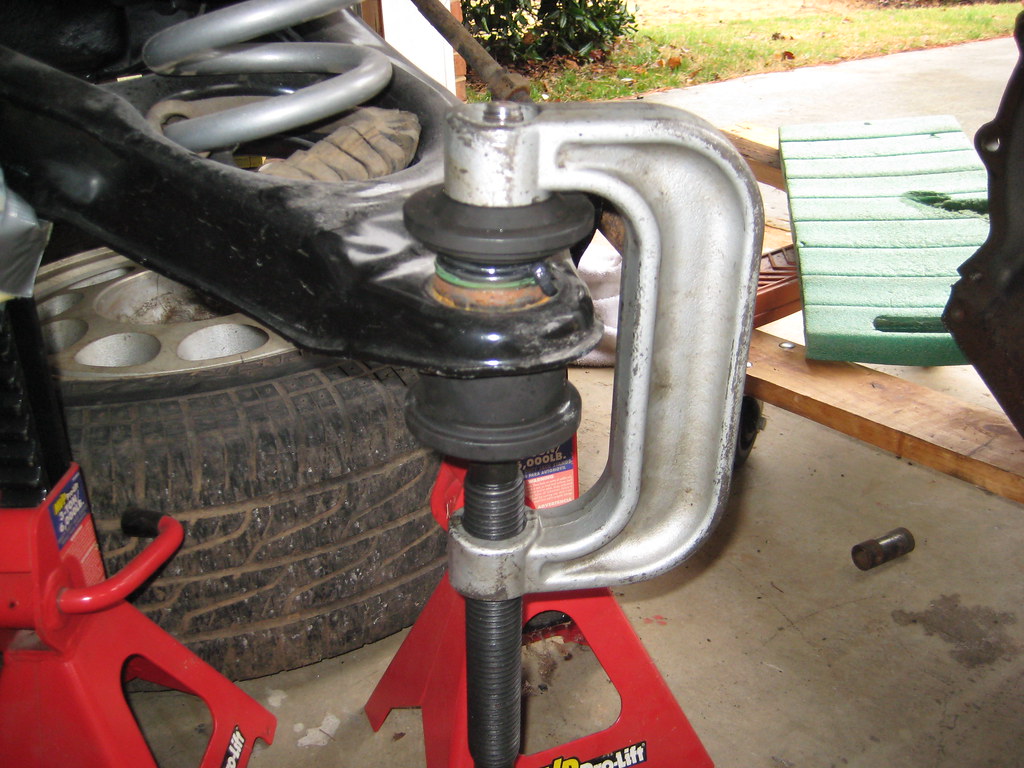
After fighting with the upper control arms, I finally got them installed. The driver's side spring went in pretty easily, but I needed Meg to push down on the passenger's side while I tried to get it it. That took about 10 minutes!

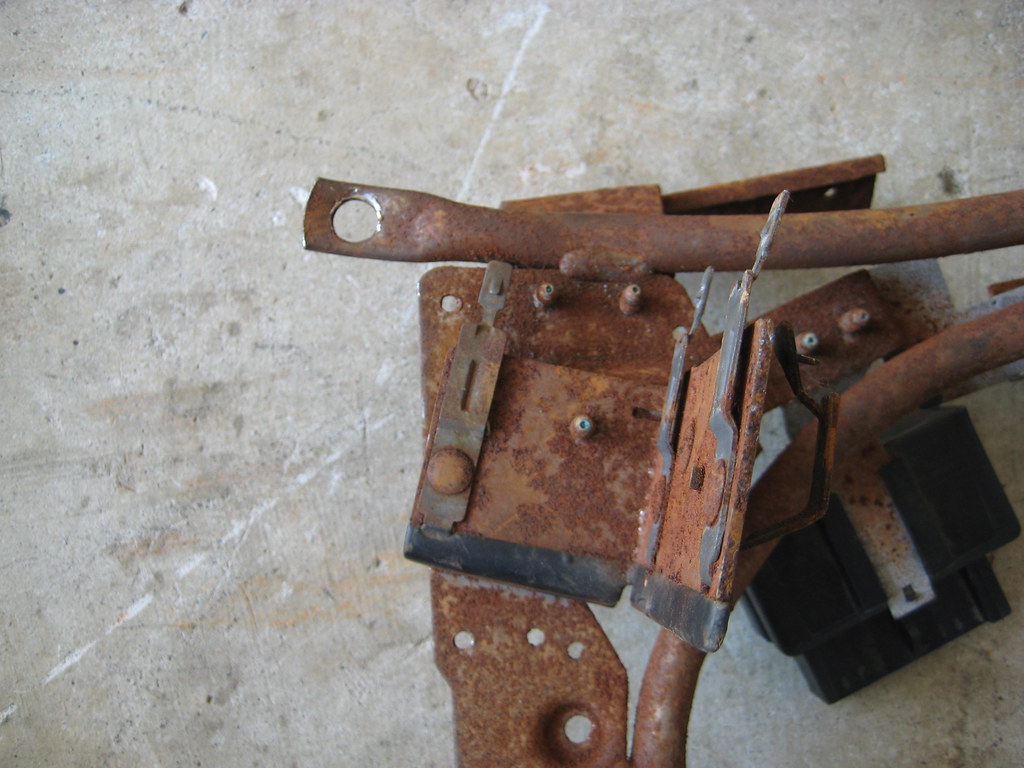
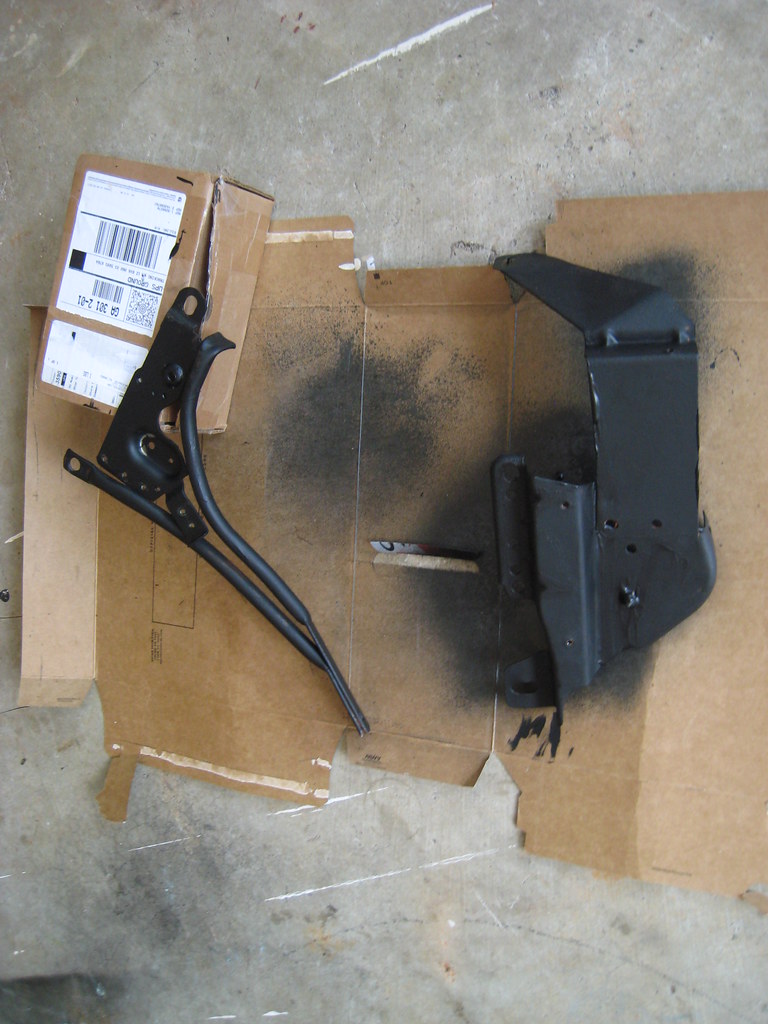
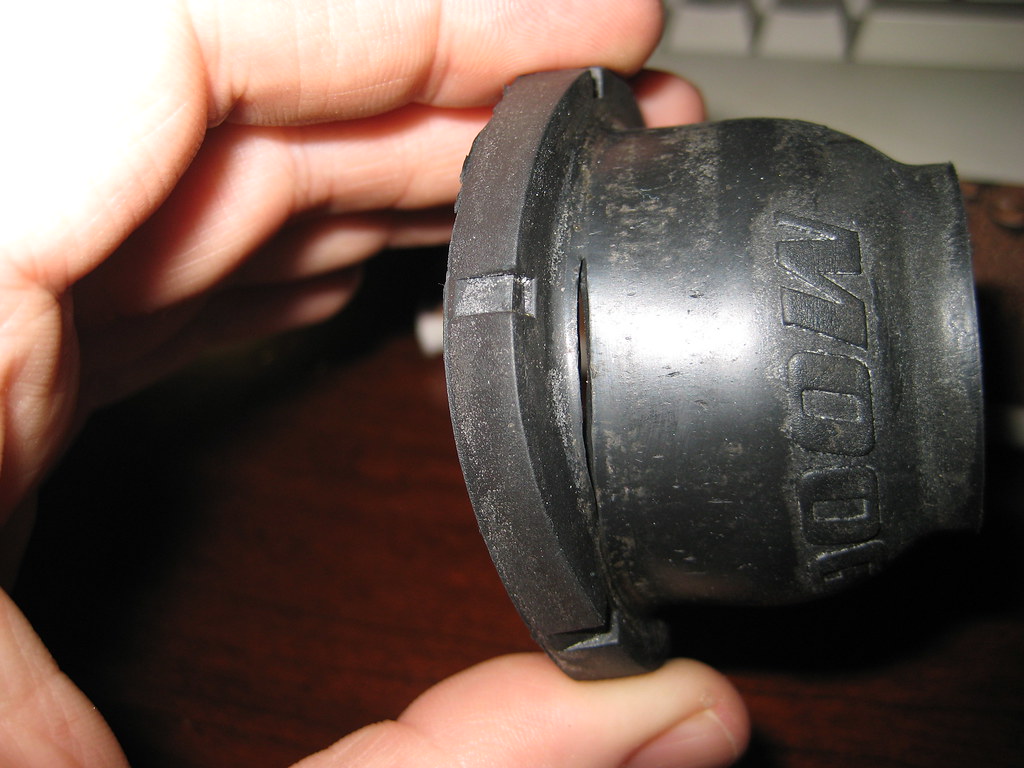
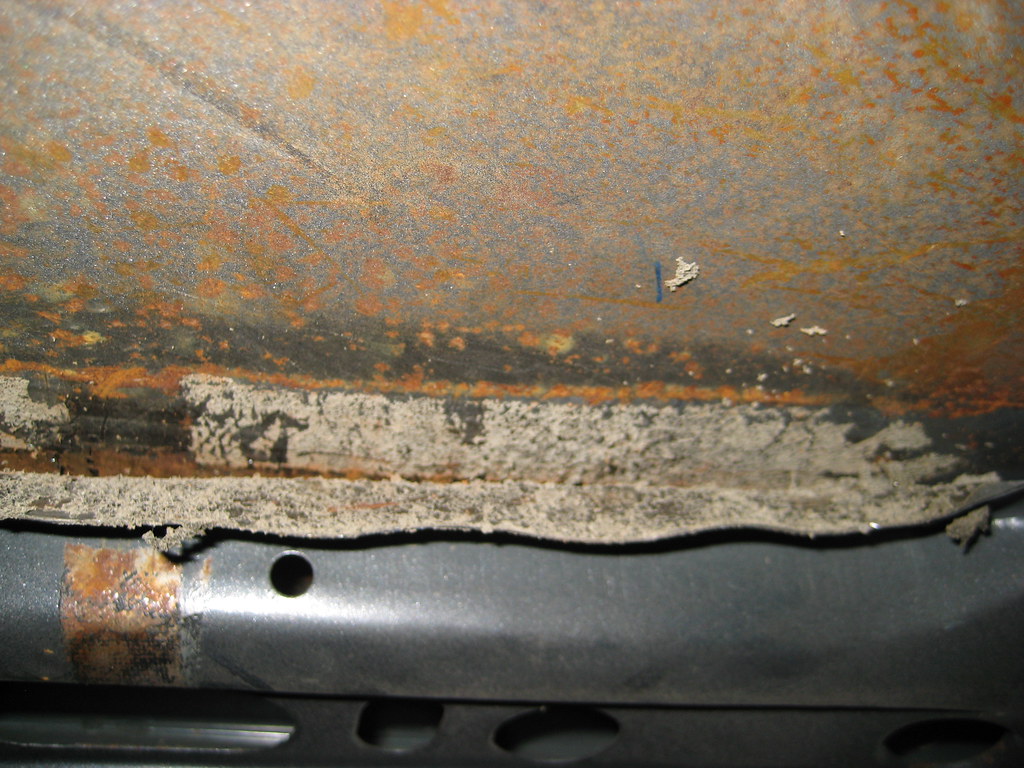
I also did a bunch of minor rust-related cleanup on some brackets. I swear every fastener and bracket on this car is rusted!

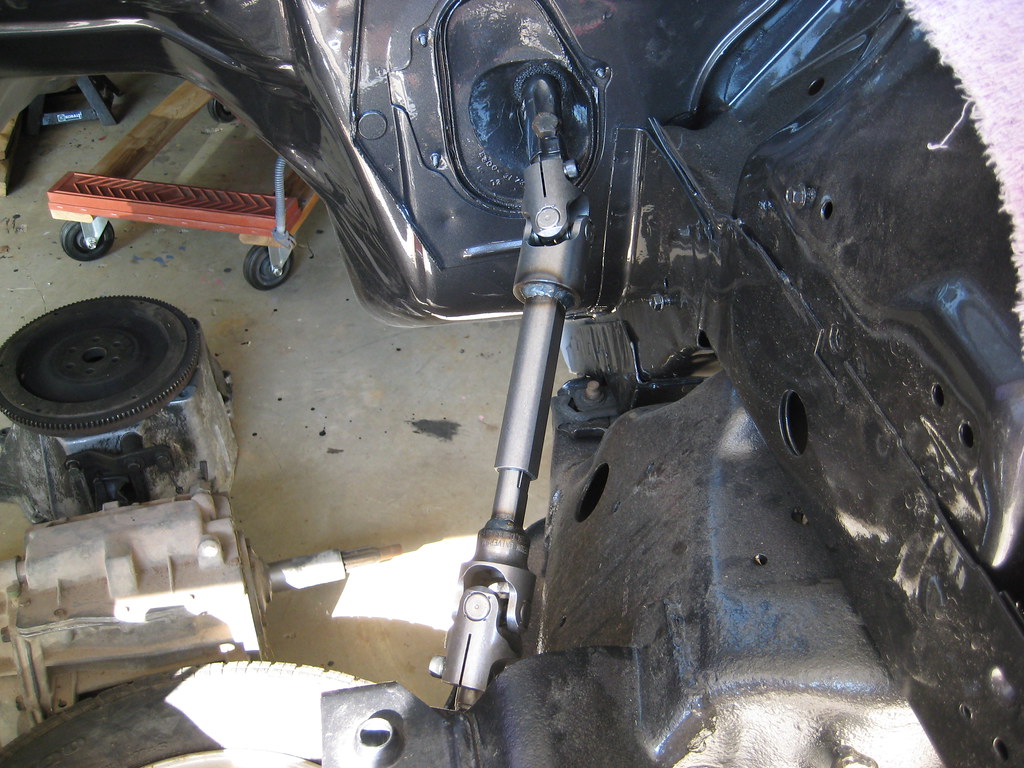
The brake booster took 5 seconds to install and 20 minutes to get the top most nut on. But I remember that from taking the old one out, so no frustration.

I did end the weekend on a good note. I bought four '10 hole' rims, a double hump transmission cross member, a starter and a couple of interior parts I need from Jason who did the frame/front end work.

He also gave me an idea for how to deal with the missing brake bracket. I'm going to research it a little more, but I may do what the guys with coil-overs do, since they have to remove the bracket. More on this next week.

(Did I mention that I also finished my spring-break project? Painted the trim on all the upstairs windows, removed the windows from the front of the house, repaired, primered, painted and reinstalled them. I had trouble getting my arms above my shoulders Sunday night from everything I was doing!)

Sunday, May 22, 2011

Busy Spring!

Long time between updates

This Spring was really busy with kid events, company events, Mother's Day and some less than nice weather. So didn't get a lot done on the car between April and now.

First, I installed the Maximum Motorsports Bumpsteer kit


Installed a re-manufactured 2003 Cobra steering rack

Finally the Maximum Motorsports solid steering shaft to allow me to use the 2003 Cobra rack with the stock steering wheel


The front suspension is now pretty much done.


Next I cleaned up the undercarriage, seam sealed the panels between the floor and door jams and finally painted the entire undercarriage!


Next up: brake lines have been ordered (shipped last Friday!), I need to order the replacement master cylinder and booster (replacing with stock if I can find them) then plumb the entire brake system.

Capri and Mustang fuel necks are the same

A few people suggested that the fuel neck for the Capri was one of the few differences (besides the obvious body panels) between the Fox Chassis Mustangs and Capris. Since mine was totally rusted out on the inside I found one online (eBay I think) and compared it to the old one. No differences.


Sunday, April 10, 2011

Repairing the heater box

Another part that has proven fun to replace/repair has been the heater box that some critter lived in at some point in the past. (see this blog for what/when)

You'd think this would be an easy part to find, given how many of these cars were made. Except that every junk yard I called said they had them, but I'd need to come down and take the dash out to see if it was cracked or not. Since it takes several hours to get the dash apart before even knowing if I had a good one, that wasn't an option.

Someone suggested having the crack 'plastic welded'. I'd never heard of this, but it is basically what the name suggests: using molten plastic instead of steel to weld something together.

Jeff @ Mo's Speed Shop did it for me. Not the prettiest thing ever, but it will work. If I want I can sand it down to be flat, but since it will be hidden behind the dash I won't bother.

Pictures, Before:


After:


Installing Maximum Motorsports Caliper Sleeves

One thing I kept coming across when researching the upgrade to the brakes for the Capri was to get a pair of Maximum Motorsports caliper sleeves instead of relying on the rubber stock ones when I went for the 87+ brakes.

http://www.maximummotorsports.com/store/index.php?main_page=product_info&cPath=49_136_138&products_id=666

So over a couple of weekends I installed them. Why a couple of weekends? Well, this 27 year old car is proving to be a little fickle at times ...

FIRST THING TO CHECK. Make sure that the caliper bolts you have fit into the sleeves! Aftermarket bolts from Dorman you get at O'Reilly's or Autozone DON'T FIT the sleeves! Better to know this before you destroy the rubber isolators!

First step of installation is pretty easy, remove the calipers. Granted mine are brand new and I don't have brake lines yet. That being said, you don't need to remove the brake lines to do this, just make sure you don't leave them hanging by the hose if you take a break.

Next pull out the old rubber isolators with a pair of needle nose pliers.

Then test fit each hole in each caliper to see if the sleeves slide in easily. Don't try to force them, you are looking for holes that are slightly larger than the sleeves, which means some extra work. I found one of mine was too large, so I asked MM's tech support line what to do and they told me use Loctite Sleeve Sealer #640 to attach the sleeve to the caliper. Note that I was unable to find this at any local hardware or auto parts store and had to order it online via Amazon.com.


If you have to do this, do the other sleeve on the caliper first using the instructions below before using the Loctite, since it take a day to setup before you can install.

For the sleeves that don't slide right in (which is good), use a simple c-clamp to push them into the caliper. Don't try hammering or using a punch, there isn't enough room. Plus using the c-clamp you don't have to remove the brake line.

Next issue was that the c-clamp bottoms out on itself since the sleeves slide about 1/16 of an inch past the back of the caliper. See pictures below.


The trick here to use a 1/4" bolt with washers and a 3/8" socket flipped over to form a cavity for the sleeve to be pulled in. Two or three turns on the nuts and the sleeve was fully seated.


Install the caliper, add some anti-seize to the sleeve, Loctite blue to the threads on the caliper bolt and install.

Wednesday, March 30, 2011

Horn Cover!

Quick update. Was able to get the ball joint cover installed and the driver's side suspension put back together.

I also installed some Maximum Motorsports solid Caliper sleeves to hold the brake pad against the rotor.

Lots planned for next week. Kids are on Spring Break so I'm taking the week off to do things with them (and work on the car!) Hopefully the MM bumpsteer kit and hybrid steering shaft will arrive. I'll order the 2003 Mustang Cobra rack tomorrow and it should be here on Saturday too!

One thing that's been bothering me about the car is that the 'cat' head on the horn cover is long gone. I looked around a lot last year for one and no one was selling them. Well, I found one on eBay for $5. Plus $5.20 shipping!

Here it is:

Sunday, March 6, 2011

New ball joints

I've encountered a minor setback in the Capri reconstruction. Turns out that the lower control arms I got off eBay are 94+ not 79-93. So they are slightly longer and have different ball joints.

That would have been fine if I was going with 94+ spindles and a 5 lug upgrade, but that really isn't the budget right now. The longer lengths is still a good thing, but the wrong ball joints are an issue.

As you can see from this picture, the 87+ spindle I bought doesn't fit on the ball joint correctly, so I had to replace them.


Even after buying 2 $60+ ball joints, I'm still better off than buying new Ford Racing arms by $150.

I'll not go into the details of changing the ball joints, this site has a great write up on what to do.

I will add a picture of the ball joint removal tool setup when doing the removal. Strange I couldn't find any pictures anywhere of this part.


And make sure you get a ball joint/tie rod end removal tool. This is a set of pickle forks to help the spindle come off the ball joint. It is impossible to do this job without them.

While I had it apart I installed my new Maximum Motorsports Caster/Camber plates that my Dad got me for Christmas. At first I was confused that I couldn't get the strut into the plate, but then realized that without an engine there wasn't enough weight to compress the spring enough! Even with a jack under the spring I can barely get the nut on. I'll take care of that when she's back on the ground and I can sit on the k-member.

Of course, everything didn't go correct. I managed to split the brand new grease/dust boot on the drivers side.


And it turns out that no one stocks replacements. Either buy another ball joint or go after market. After searching for awhile I found that Maximum Motorsports sells them. Of course their site is like a candy store, you can't get just one thing. So rather than paying for shipping on a $3 part, I had to get a few other things that I need to complete the front suspension and brakes. So much for the March budget.

More pictures next weekend when I finish the suspension.

Saturday, February 19, 2011

Quick update.

She rolls so easily now that I pushed her outside and gave her a good bath. My wife was rather amused watching me. Between all the media from the body being blasted, the glass from the broken 1/4 window and just stuff from the welding and body work it needed a lot of cleanup.


I also removed the 'foam' from the roof around the rusted area, sanded down the rust and put the Eastwood Rust Encapsulator on it. Also found some more rust under the cross brace where the light attached and did the same there.

Did find more rust after cleaning it good. Little stuff so no big holes to fix.

Rolled her back in the garage and called it an afternoon. Not bad for 2 hours of work.

Sunday, February 6, 2011

Back home!

First, my wife has a strange sense of humor. When I came back from Church this was in the yard:


(My daughter calls my 06 Mustang GT 'Lightning McQueen' from Cars, so the Capri is Sally.)

I left it there for when Jason and BJ brought the car over.

Here she is on the trailer.


It was a heck of a lot easier to roll off than on! Of course no glass, no hatch, no doors and working front suspension

In the garage:


I also picked up a T-5, a bell housing, clutch, pressure plate a 2.3T short block (separate head and block) and a full long block (minus the exhaust manifold and turbo).


The short block needs to be looked over, but the motor had new pistons, looks like ARP rod bolts. The pistons show some wear on the side skirts. Apparently the wrong rings were put it and it burned a lot of oil so it was pulled. The long block came out of a running xr4ti. (Pictures of the long block next weekend. It's a little heavy so I didn't get it today.)

Here is what the underside of the roof looked like when BJ cut it out. And at first all I thought was it needed a few pin holes welded shut. Wow.


Finished roof:


One area on the fender that will need a lot more attention. There are some ruts from the rust but otherwise both are pretty smooth. The whole car in general has a lot of ruts on it.


Another reason I love my wife. Friday night at dinner I asked her to pick up 4 or 5 new, big bath towels when she was out shopping with our 13 y/o. Without missing a beat she said 'for the Capri I'm assuming?'. Of course I told her I was going to offer to trade her for some of the more beaten up towels we use. Her response "sure you were".

Everything is now nicely tucked back into the garage, waiting for some warm weather, and time!